
How long does it take to manufacture a hardware product?
I originally wrote this piece for the Mindtribe blog! Lots of good stuff there.
The hardware development process is a real challenge if you’ve never been through it before.
There are so many steps to get from concept to production, so many details to get right. And - especially as a startup - so little room for error!
But in a lot of ways, the process is getting easier. The ecosystem of hardware tools and resources is growing quickly. Great prototyping devices like Arduino make developing that first concept prototype easier than ever. 3D printing can help you validate your enclosures in no time. You can often find yourself at a great looks-like/works-like prototype in record time. And even from there, folks like Dragon Innovation can help you get your CM worked out, get your DFM feedback implemented, etc.
So now you just tell your manufacturer to hit the big “GO” button, and it’s off to the races, right?
Unfortunately, no. Many new hardware people don’t realize this, but even once the looks-like/works-like prototype is done and a CM has been selected and the DFM feedback is incorporated into your designs, there is still a long, arduous path to mass production. Long story short, getting from tool release to mass production can easily take 4-6 months.
Building one or two very nice prototypes is a lot different from building many thousands of something every day. There’s a whole process to get from one to the other - the production ramp. Today, I’ll break down the major steps of the production ramp and how long they can take. This graphic will be our guide:
It can easily take 4-6 months to manufacture the simplest electronic product.
A few important caveats before we dive in. First, the manufacturing process is incredibly different for each product. The goal of this post is to give you a rough, back-of-the-envelope understanding of the production process steps and how long it can take. Use this to make smart decisions about your runway, communicate intelligently to your investors and backers, and manage your own sanity. Second, the steps and timeline presented here are reasonable estimates for simple to medium complexity hardware products. Think connected devices, IoT, etc. When you get to much more complicated and/or highly-integrated projects (smartphones, high-end wearables, etc.) it’s an even longer, more complicated process.
The Process
Different companies will title the steps of the production process slightly differently. However, it’s generally safe to talk about production in terms of tooling followed by EVT, DVT, and PVT. Exactly what work is grouped into which category can also vary between organizations, but here I'll strive to show a fairly standard version.
Tooling
For any design-driven housing, you’re probably using injection molding for your plastics. We described a bit about how the process works when we discussed manufacturing electronic housings. A brief recap:
In [injection molding], highly pressurized, melted plastic is rapidly forced (shot) into a metal mold (the tool) in the shape of the desired housing. When the plastic cools and hardens, out comes the container.
Creating that mold takes time, though. On top of that, you may need other types of custom tools to machine non-plastic parts (metals, wood, etc.), and stencils and masks will need to be made to fabricate your custom electrical boards.
The upper-side tool for a Lego injection mold (source). You can see how it takes time to make something like this.
The delay between when you send your properly DFM-modified mechanical CAD package to your manufacturer and when they are ready to start producing your first enclosures can easily be as long as 8 weeks.
EVT
Now your molds are ready. Your first batch of plastic components (called “first shots”) are in, as well as first revisions of other machined components. Your first major board spin is in, too. You’ve got enough parts for something like 50-100 units. Your engineering team will gather around and try to assemble and test a few units.
Not everything will go as planned.
Mechanically, snaps and fits will be bad. Maybe you’re now failing a drop test your prototypes used to ace. There will also be cosmetic defects such as lines, creases, and other deformations in the plastics. You’ll need to modify your molds and your injection molding parameters (temperature, pressure, cooling time, etc.) until things start to look better.
You’ll also be working on the color of your units. While early looks-like/works-like prototypes were painted, you’ll now be mixing plastic color pellets into your base plastic resin to get the right hue. Dialing this in can take time.
A progression of early shots of the Lyft Glowstache. Note some of the marks on the first model and the addition of color later on.
Electrically, you’ll have issues. There will be bugs that didn’t occur when your parts were sourced from different vendors, variances you didn’t notice when you were building smaller quantities. Some LEDs won’t be as bright as others, some batteries will be bad, some boards won’t program. Maybe you’ll need to modify the board slightly to fit mechanically.
Similarly, you may catch firmware bugs that weren’t apparent at smaller quantities.
This collection of trying to manufacture your first few units - and then trying to fix everything that is broken - is known as Engineering Validation Test, or EVT. EVT is the first time your engineers will try to build units using manufactured parts, not prototype parts. Instead of components from Digikey, PCBs from a local manufacturing shop, and 3D printed or machined parts, you’ll have real production-intent components. Some issues - maybe a lot of issues - will crop up, and they’ll need to be addressed.
At the end of EVT, you should be able to consistently manufacture units that work like and (for the most part) look like your prototypes. All the tweaks, mods, changes, and re-testing can easily take 6 weeks.
DVT
After EVT, you feel confident that engineering functionality is dialed in. Now you have several more tasks - finalize your cosmetics, perform final testing, and set up your first assembly line. This set of tasks is named Design Validation Test - DVT.
First, with the coarse tool changes complete, it’s time to dial in the fine details that will be the finishing touches on your enclosure. You’ll texture your molds in various ways to give your parts just the right look and feel (glossy, matte, sanded, stippled, etc.). You might also treat your parts further after injection molding - powder coating, anodizing metal parts, etc. Depending on how strict your Industrial Design requirements are, getting the look and feel of the product juuuust right can take a lot of time and effort.
We used a soft-touch paint to finalize the look and feel of the Lyft Glowstache.
At the same time, you’ll need to finalize your product testing. Recall that you should have been performing a variety of tests as you developed your product. There are the critical tests to determine if your gadget will survive the real world - drop testing, thermal and environmental testing, shock and vibration testing, etc. Additionally, you should have been performing pre-scans and evaluations for any certifications you want your product to have (FCC, UL, CE, NOM, etc.). Now, you’re ready to perform your final tests and go for your certifications. If you’ve been thorough, there won’t be any surprises. But surprises do happen, and any challenges in testing can lead to small design changes, or, at minimum, product disclaimers.
Apple puts their products through a variety of rigorous tests - such as determining how much force it takes to bend an iPhone (source).
At this point, your aesthetics are dialed in and your units are tested and certified. Now comes the final thrust of DVT - setting up your first assembly line.
The assembly line (also known simply as “the line”) isn’t a fancy machine - it’s people who work at the factory, assembling electronic devices. It’s your job to design an assembly process that organizes these people in a way that is simple, intuitive, reasonably error-proof, and accomplishes the goal of assembling your product. Generally, that organization takes the form of a set of stations and checkpoints on a factory floor that transforms your device from a bucket of parts to an assembled and tested product. There’s a lot that can go wrong here. If one of your stations takes twice as long as the one before it, you’re going to have a major backup. Maybe it needs to be separated into multiple stations, or you could develop a test fixture to make that step easier. Perhaps your instructions make sense to you, but not to the factory workers. Revisions will have to be made. Or maybe a test station is getting skipped - do you have any way to detect that further down the line?
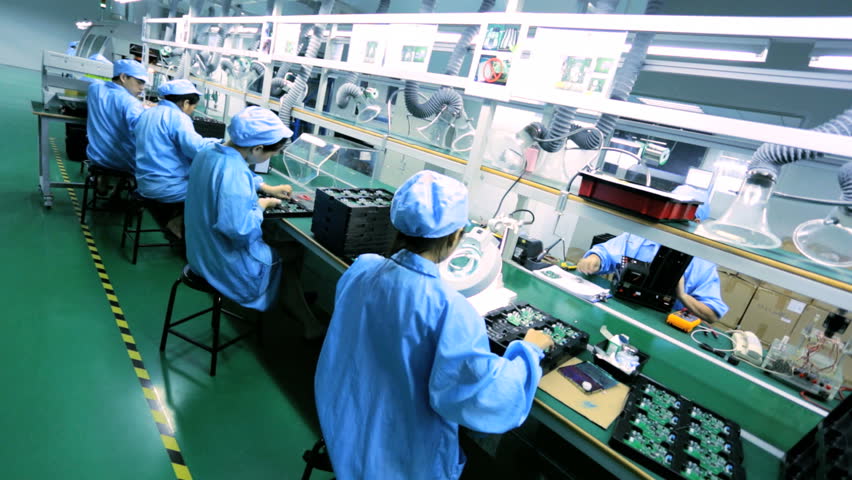
Your first assembly line might look something like this (source).
A properly designed line will check each component separately, assemble the components, and then do an end-to-end functional and cosmetic test of your product. It may also program the firmware and/or serialize each unit (give it a unique identifier). Above all, a line will flow smoothly from start to finish and detect any problems with the unit. After all, there’s nothing worse than delivering a malfunctioning unit to an end user - especially if you’re an early stage startup still building a reputation.
DVT takes time. You don’t exit the DVT stage until you are consistently manufacturing and smoothly assembling units that pass all tests - cosmetic, compliance, reliability, etc. This will require several rounds of iterating on both your engineering designs and your assembly line setup. The whole process can easily run you another 6 weeks.
PVT
After EVT and DVT, you can consistently manufacture and assemble functional and cosmetically polished units. You can even start to sell DVT units! But that first assembly line you set up during DVT won’t be enough to assemble units at large scale. For that, you’ll need to set up multiple assembly lines and refine your processes even further.
Now, all of the challenges you faced setting up your first assembly line during DVT will be amplified. Lines will need to branch and intersect, test fixtures will get overloaded, weaknesses in your documentation will become more apparent. You’ll need to add more infrastructure to the process - more tests, checkpoints, test fixtures, etc. All of the bumps and kinks will need to be smoothed over, until all of your assembly lines are running as smoothly as your single line did in DVT.
A shot from Motorola’s (now shuttered) Moto X assembly factory in Texas (source). Your connected device assembly process won’t be quite this complex, but don’t underestimate the amount of effort it takes to get it right.
Finalizing a high-volume assembly process is what PVT - Production Validation Test - is all about. A few rounds of iterating on your assembly setup can take another 6 weeks.
For more details on EVT, DVT, and PVT, check out the Fictiv post on Pre-Production Hardware Testing.
Test Fixtures
We mentioned test fixtures in our timeline graphic and in our discussion of DVT and PVT, but what are they? A proper discussion of these tools could easily be a whole blog post (or a series of posts) in and of itself. But let’s try to capture the concept.
As an early stage hardware startup, you’ll want to test every board that is manufactured. You want to verify that, as the manufacturing process progresses, you’re not getting any defects in manufacturing or programming your boards. And defects can happen mid-way through production. An error loading your pick-and-place machines can result in the wrong resistor value getting loaded onto a board. A tiny error like this (one ½ cent part instead of another) can totally destroy your board.
To test every PCB quickly and effectively, we use test fixtures. These fixtures interface with your board and verify some aspect of its performance.
Test fixtures come in many different flavors. The most well known is the In Circuit Testing (ICT) fixture, also known as a “bed of nails.” An ICT fixture consists of a grid of metal probes designed to touch testpoints on your PCB. The fixture will then measure the voltages at those testpoints, and can flash an alert if any values are unexpected. It’s this kind of test that could detect an incorrect resistor on your board.
A bed of nails electronic test fixture (source).
But really, a test fixture can measure anything a sensor can. Test fixtures can have microphones, cameras, magnetometers, temperature sensors, the list goes on. These fixtures measure any relevant parameter to your PCB’s operation and assure you that the board is working properly.
A test fixture measuring and validating LED color and brightness on a PCB (source).
A good manufacturing effort involves building two products - your company’s actual product, and the test fixtures that validate its functionality. It helps that many good CMs have the capability to develop test fixtures for you in-house. But they’ll need support from your electrical team (test point layout, an electrical test plan), firmware team (custom firmware that cycles the device through its possible states), and possibly even your software team (custom LabView and/or Python scripts to run the tests). And it’ll cost you. Plan accordingly.
Developing test fixtures is expensive, time consuming, and absolutely critical. They help you quickly catch bugs in your production process, and, because of that, they save you money in the long run. It’s a lot less expensive to fix or replace a bad PCB than it is to scrap an entire unit - assuming your final end-to-end test catches the problem. It’s certainly less expensive than delivering bad units into the hands of your users, which can have far-reaching consequences for a young company.
In Conclusion...
Don’t underestimate the time it takes to get your production through the production process, and don’t take shortcuts! The time you take to develop test fixtures and progress slowly and carefully through the EVT, DVT, and PVT steps will save you time and money in the long run and deliver solid, dependable units into your customer's’ hands.

